How to Choose a Thermal Inspection Camera for Accurate Field Work
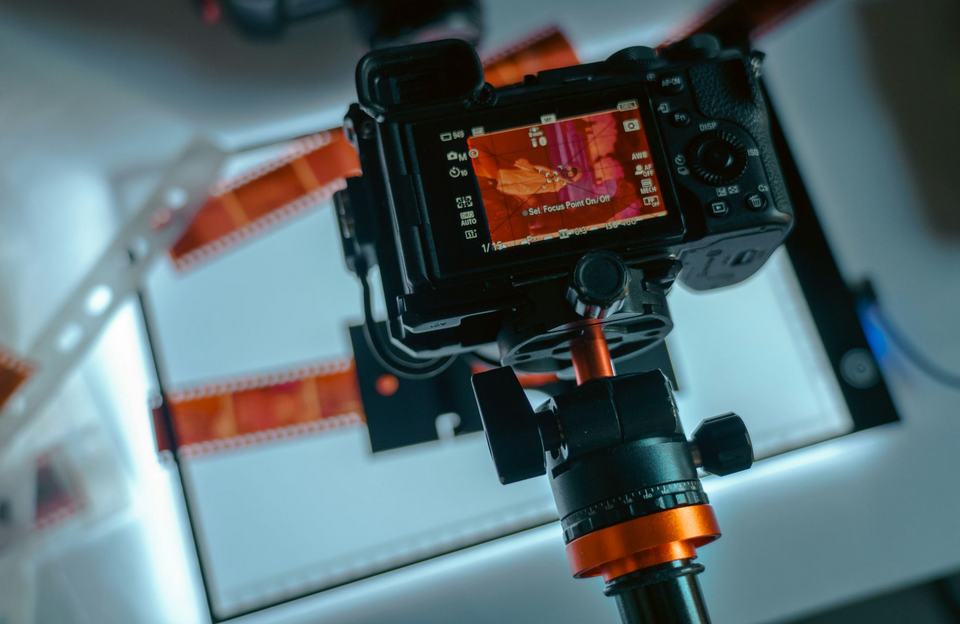
A thermal camera can help prevent costly faults by spotting an overheating contactor before a panel trips, or by flagging a failing bearing before a production line stops. That value depends on choosing a camera that is accurate enough for the work you actually do.
Many growing businesses buy on price alone, then discover in the field that the image is too coarse to measure a small cable joint from a safe distance, or that the lens captures half the switchboard but not the detail they need. The result can be unclear reports, repeat site visits, and reduced confidence from clients or insurers.
This guide translates the technical specifications found on manufacturer datasheets into practical buying decisions. It is written for operations leads, maintenance managers, and founders at UK and European SMEs who need a field-ready camera that delivers clear, repeatable results without an enterprise budget. Specialist R&D or scientific cameras are out of scope.
When you compare options, it helps to scan a product-family page for a handheld thermal camera to see how resolution, temperature ranges, autofocus, and lens field-of-view options map to different inspection tasks. The FLIR Exx-Series page, for example, publishes those spec categories clearly, which gives you a useful benchmark for short-listed models.

Key Takeaways
- Accuracy depends on optics and technique together. Resolution, lens choice, focus precision, and correct emissivity settings all contribute. Hardware alone is not enough.
- Match specs to your actual jobs and working distances. A high-resolution detector paired with the wrong field of view can still produce unreliable measurements.
- Total cost goes beyond the purchase price. Lenses, calibration, batteries, software licences, training, and downtime during service all affect the real cost over the camera's lifespan.
- A structured shortlisting process prevents expensive mistakes. Work through jobs, specs, ruggedness, reporting, and support in sequence so the decision stays grounded in your needs.
Who This Guide Is For
If you manage maintenance, facilities, property, or construction operations at an SME, this guide is for you. Typical use cases include:
- Predictive maintenance on electrical panels, switchgear, and distribution boards.
- Monitoring rotating equipment such as motors, pumps, and bearings.
- HVAC commissioning, duct leakage checks, and underfloor heating verification.
- Building envelope surveys for insulation gaps, moisture ingress, and air leakage.
The guidance applies whether you are buying your first thermal camera or replacing an older model that no longer meets your reporting requirements.
Map Your Jobs to Spec Priorities
Different inspection tasks stress different camera capabilities. Before opening product pages, list the jobs you will perform and note the typical target size and working distance for each.
Use that list to compare manufacturer-stated specifications, not just model names; a product-family page for a handheld thermal inspection camera can help you see how resolution, temperature range, focus options, and lens field of view fit common site tasks.
Electrical panels and switchgear: Targets are often small, such as individual connections or fuses, and are usually viewed from about one to three metres. Prioritise high resolution, a narrow or telephoto field of view, and reliable autofocus or manual fine-focus override.
Rotating equipment, including motors, bearings, and conveyors: Targets may move or vibrate. Fast autofocus and the ability to capture continuous or video-mode thermal data may help more than maximum resolution.
Building envelope and roofing surveys: You are looking for subtle temperature differences across large surfaces. A wide field of view, high thermal sensitivity, and correct emissivity settings for different building materials matter most.
HVAC ducting and pipework: Working distances can vary from very close ceiling voids to several metres. Consider whether one fixed lens covers your range, or whether swappable lenses would be more practical.
Accuracy, Simply Explained
Accuracy in thermal imaging is not a single number. It is the combined result of several hardware and technique factors working together.
IFOV and Spot Size
IFOV, or instantaneous field of view, describes the smallest area the camera can measure at a given distance. Think of it as the camera's "pixel footprint" on the target. If your target is smaller than the spot size at your working distance, the temperature reading will be averaged with the surrounding area and may be wrong. Manufacturers publish IFOV in milliradians (mrad). A smaller IFOV number means finer detail at distance.
Thermal Sensitivity (NETD)
NETD, or noise-equivalent temperature difference, tells you the smallest temperature difference the detector can distinguish. A camera with a manufacturer-stated NETD of 0.04 °C can, in principle, detect subtle thermal patterns, which is useful for finding early-stage faults or small insulation defects. Confirm the exact NETD value on the model's datasheet rather than relying on typical figures.
Emissivity and Reflected Apparent Temperature
Emissivity is a measure of how efficiently a surface radiates thermal energy. Most non-metallic building materials have high emissivity, usually above 0.90, so the default camera setting often works. Polished metals and reflective surfaces have low emissivity, which can cause large measurement errors if left uncorrected.
A practical field method is to apply a strip of matte electrical tape to a reflective target, let it reach the same temperature as the surface, and measure the tape instead. Also set the reflected apparent temperature in the camera to account for energy bouncing off nearby heat sources.
Focus
An out-of-focus thermal image does more than look blurry. It spreads thermal energy across pixels and distorts the measurement. Sharp focus is essential for temperature accuracy. Allow the camera a warm-up period, typically five to ten minutes after power-on, before taking critical measurements because internal temperature drift during warm-up can affect readings.
Resolution and IFOV in Practice
Thermal cameras commonly offer detector resolutions from 160 x 120 pixels up to 640 x 480 pixels, with mid-range options such as 320 x 240 or 464 x 348. Higher resolution gives you more pixels on the target at the same distance, which means a smaller IFOV and more reliable readings on small components.
Do not assume you always need the highest resolution available. If most of your work involves large surfaces viewed at close range, such as duct surveys in ceiling voids, a mid-range detector paired with the right lens may be adequate and less expensive.
One important caution: digital zoom does not improve measurement accuracy. It simply enlarges existing pixels. If you need to measure a small target at distance, optical resolution and lens focal length are what matter.
Lenses and Field of View
The lens determines how much of the scene you capture in a single frame, expressed as the field of view (FOV) in degrees. A wide-angle lens, such as 42° or more, captures large areas but reduces detail on small targets.
A telephoto lens, such as 12° to 15°, captures less of the scene but resolves finer detail at longer distances.
Before assuming you need interchangeable lenses, check the model's datasheet to confirm whether lenses are fixed or swappable and which FOV options are available. Some product families offer several lens choices, while others ship with one fixed lens.
Quick checklist for choosing FOV:
- List your most common target sizes and working distances.
- Calculate whether the camera's IFOV at those distances covers your smallest target. Manufacturers often provide online calculators or reference tables.
- If your jobs span very different distances, consider a model with swappable lenses or one with a wide native FOV plus a telephoto option.
- If most of your work is at similar distances, a single well-chosen fixed lens may be simpler and more cost-effective.
Focus Systems
Modern thermal cameras may offer manual focus, autofocus, laser-assisted focus, or touch-to-focus, where you tap the screen on the area of interest. Each has trade-offs.
Autofocus is fast and reduces user error in routine scanning. It works well for many inspection tasks, especially when moving between targets quickly.
Manual focus override is important when you need precise control, such as focusing through a mesh panel guard on a motor, or when the autofocus locks onto the wrong plane.
Laser-assisted focus uses a laser distance meter to calculate focus automatically. This can improve speed and consistency in the field, but confirm whether the feature is included on the specific model you are considering.
Whichever system you choose, verify focus before saving a measurement image. A slightly soft image may look acceptable on a small camera screen in bright daylight but can lead to measurement drift when analysed later on a desktop.
Temperature Range and Measurement Accuracy
Every thermal camera has a specified measurement range, such as -20 °C to 650 °C or wider for high-temperature industrial use. Make sure the range covers the extremes you expect in your work.
Electrical inspections in buildings rarely exceed a few hundred degrees, but if you inspect kilns, boilers, or process equipment, you may need a higher ceiling.
Manufacturer-stated measurement accuracy is usually expressed as a tolerance, such as plus or minus 2 °C or plus or minus 2% of the reading, whichever is greater. This is a best-case figure under controlled conditions. In the field, accuracy also depends on emissivity, focus, distance, and environmental conditions.
For tasks involving very small temperature differences, such as early-stage bearing wear or subtle insulation defects, thermal sensitivity (NETD) may matter more than the absolute accuracy tolerance. A camera with low NETD can reveal patterns that a less sensitive detector may miss.
Ruggedness and Usability for Field Teams
Specifications matter little if the camera cannot survive a normal workday. Check the following before shortlisting:
For construction and facilities teams, rugged tool choices also support reducing site errors because clearer capture routines, durable controls, and consistent documentation make it less likely that an issue is missed during a busy site visit.
- Ingress protection (IP) rating: An IP54 rating offers reasonable dust and splash resistance for outdoor UK conditions. Higher ratings are available for harsher environments.
- Drop rating: A two-metre drop-test rating is a sensible minimum for handheld field tools.
- Operating temperature range: Verify that the camera operates reliably in the cold. UK winter mornings on an exposed rooftop can drop below 0 °C.
- Screen visibility: A bright, daylight-readable screen saves time and reduces errors outdoors.
- Battery strategy: Consider run time per charge, whether batteries are hot-swappable so you can carry spares, and charging time. A camera that dies mid-survey can lead to a repeat visit.
- Glove-friendly controls: Physical buttons or a responsive touchscreen that works with light gloves are practical advantages in cold or dirty conditions.
Connectivity, Reporting, and Data Handling
The image you capture is only useful if it reaches a report your client, insurer, or manager can act on. Consider the full data workflow:
If inspectors work across multiple sites, field team software can provide useful context for scheduling, photo-based evidence, asset histories, and report handover, even when the camera itself remains a standalone tool.
- Can you add on-device annotations, voice notes, or text tags to images in the field?
- Does the camera support Wi-Fi or Bluetooth transfer to a phone or tablet for quick sharing?
- What desktop or cloud software is included, and what requires an extra licence?
- Can reports integrate with your existing CMMS, or computerised maintenance management system, or asset register?
- Who owns the thermal images, and where are they stored? Clarify data governance, especially when working on client sites.
As you plan the wider inspection technology stack, connected device insights can help you think through how meters, sensors, mobile devices, and analytics should share information without creating unnecessary data silos.
Calibration, Service, and Training
Thermal cameras require periodic calibration to maintain measurement accuracy. Find out the manufacturer's recommended calibration interval, commonly every 12 to 24 months, and whether local service centres can handle it without long shipping delays.
Also check access to manuals, knowledge bases, and technical support. For SMEs without a dedicated thermography team, onboarding and refresher training can improve measurement repeatability and report quality. Some manufacturers and third-party providers offer Level 1 thermography courses aligned to standards such as ISO 18436-7, which may be worth budgeting for alongside the camera.
Budgeting and Total Cost of Ownership
The camera body is usually the largest single cost, but it is not the only one. Build a realistic total-cost-of-ownership estimate that includes:
- Additional lenses, if applicable.
- Spare batteries and chargers.
- Protective carry case.
- Calibration costs over the expected lifespan.
- Software licences, including any annual subscriptions for reporting tools.
- Training for each technician who will use the camera.
- Downtime during calibration or repair.
On the return side, a suitable thermal camera can help reduce unplanned failures, identify energy waste from insulation defects, and cut repeat visits by producing clearer reports the first time.
Step-by-Step Buying Workflow
Use this sequence to move from a long list to a focused shortlist:
- Define jobs, targets, and distances. Write down every inspection task, the smallest target you need to measure, and the typical working distance.
- Choose resolution and IFOV. Match detector resolution to your smallest-target-at-distance requirement. Use manufacturer IFOV calculators where available.
- Pick lens and FOV. Select the field of view that covers your most common scenarios. Decide whether swappable lenses are justified.
- Confirm focus system. Decide whether autofocus alone is sufficient or whether manual override is essential for your environment.
- Check range and NETD. Ensure the temperature range covers your extremes and that thermal sensitivity suits the temperature differences you need to detect.
- Verify ruggedness and battery. Confirm IP rating, drop rating, operating temperature, and battery run time against your typical workday conditions.
- Validate reporting workflow. Test whether the camera's software and connectivity fit your reporting and asset management tools.
- Plan calibration and training. Confirm calibration intervals, local service availability, and the cost of training for your team.
- Build a TCO estimate and shortlist. Add up all costs over three to five years. Compare two or three models side by side.
- Field-test before committing. If possible, arrange a demonstration or loan unit. A 30-minute hands-on test in your actual environment is often more useful than a datasheet.

Common Mistakes to Avoid
- Relying on digital zoom for measurements. Digital zoom enlarges pixels; it does not add detail. If you need to measure small targets at distance, invest in optical resolution and the right lens.
- Ignoring FOV at your actual working distance. A wide-angle lens that looks impressive on a demo bench may not resolve the targets you need at three metres.
- Skipping emissivity settings. Leaving emissivity at the default on a polished stainless-steel surface can introduce errors of tens of degrees.
- Undervaluing battery strategy. Running out of charge mid-survey may mean a return visit, which costs more than a spare battery.
- Buying software that does not fit your reporting needs. Confirm compatibility and licensing costs before purchase, not after.
- Neglecting compliance checks. If your procurement process requires equipment to carry specific conformity marks, such as UKCA or CE, or if end-of-life obligations under WEEE or RoHS regulations apply, verify these details against official regulatory guidance before placing an order.
Conclusion
Accurate field thermography comes from the combination of the right optics, good technique, and a camera that fits your working conditions. No single specification guarantees good results on its own. Resolution matters, but so do lens choice, focus discipline, emissivity awareness, and a reporting workflow that turns images into useful information.
If you are new to thermal inspection, consider starting with a small pilot: one camera, a few defined inspection routes, and a structured reporting template. Refine the process before scaling. The checklist and workflow above should give you a clear path from initial research to a well-informed purchase.

.jpg)