How to Fix Shaky Footage Without Learning Stabilization Settings
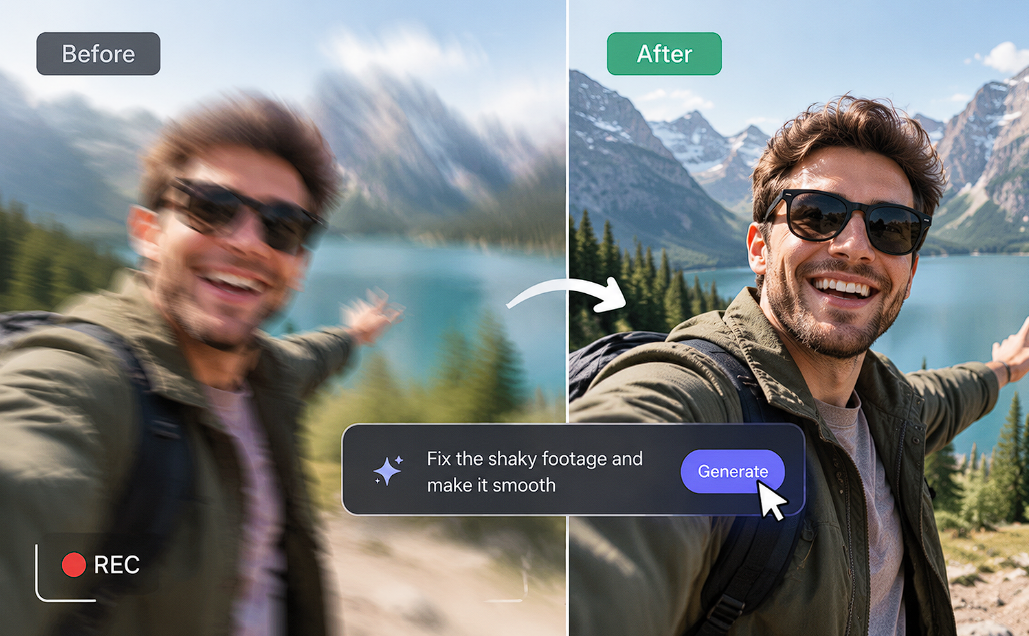
Shaky footage is one of the most common problems businesses run into with raw video. A handheld interview, a walk-and-talk clip filmed on a phone, and a quick product demo grabbed without a tripod nearby, the content is usable in every other way, the framing is fine, and the message is clear, but the shake makes it hard to watch. Fixing it traditionally means opening a stabilization panel and adjusting settings that most people, understandably, have never had a reason to learn.
That is the actual barrier here. Describing the problem is simple: the clip is too shaky and needs to be smoother. Solving it has historically been harder, because the tools built for the job assume the person using them already understands what each setting does.
Here is how to fix shaky footage by describing the problem rather than adjusting sliders manually.
Why stabilizing footage usually means learning settings first
Most stabilization tools work the same way. A strength slider, a smoothness value, sometimes a separate control for rotation versus horizontal movement, and a crop percentage that trims the edges of the frame to give the correction room to work. None of these labels explain what they will actually do to the footage until they are applied and the result is previewed.
That trial and error adds up quickly. Push the strength too high and the footage starts to warp, background objects bend slightly, and edges wobble in a way that looks worse than the original shake. Set it too low and the clip barely changes. Getting it right usually means applying a setting, watching the result, adjusting again, and repeating that cycle, which is a slow way to fix something that should be straightforward.
The other problem is that these controls treat every kind of shake the same way. A slight handheld wobble and an aggressive walk-and-talk shot both get run through the same sliders, even though they need very different amounts of correction to look natural.
Directing the fix instead of adjusting it manually
Invideo editor approaches this the way it approaches other editing decisions, through direction rather than manual controls. Instead of locating a stabilization panel and testing slider values one at a time, the correction is applied by simply describing what is wrong with the clip; this shot is too shaky, smooth it out, and the fix is made directly on that footage.
This removes most of the guesswork that usually comes with stabilization. The direction states the outcome, a steadier version of the same shot, while the technical part, analysing the motion in the footage and correcting it, happens without anyone needing to understand what an individual setting controls first.
What the Free Online Video Editor Adds
This works because invideo editor lets teams edit videos online directly in the browser, on any computer or phone, with nothing to install first. Shaky footage, low-quality audio, and clips that still need trimming can all be handled inside the same project, cut clips, fix shaky video, clean up sound, or add music and captions, without switching between separate tools for each individual fix.
Because it runs entirely in the browser, there is nothing to set up before correcting a single clip. Upload the footage, describe the problem, and the fix applies inside the same project the rest of the edit already lives in.
What to check after stabilizing a clip
The edges of the frame are worth checking first. Stabilization works by shifting and slightly cropping the footage to compensate for movement, so a heavily shaky clip may lose a touch more of the frame at the edges than a mild one. It is worth confirming that nothing important, a subject's hands, on-screen text, or a graphic was sitting too close to the edge before the correction was applied.
It also helps to watch the full clip rather than just the opening seconds. Shake is rarely constant through a shot; a recording might be steady for the first half and rougher during a specific movement, so the correction can read slightly differently across the timeline even though the same direction was applied to the whole clip.
Common mistakes when fixing shaky footage
Applying stabilization to footage that was not actually shaky is a common issue. A clip with intentional camera movement, a deliberate pan or a slow push in, can end up looking flattened or oddly smoothed if it gets corrected as though the movement were a mistake.
Skipping a check of the cropped edges is another common gap. Since stabilization trims slightly into the frame to make room for the correction, missing this step can mean publishing a clip where something important was cut off without anyone noticing until it is already live.
Assuming one instruction covers every kind of shake is a related mistake. A slight wobble and a heavy walk-and-talk shake call for different amounts of correction, so a single generic direction applied across very different footage can leave one clip under-corrected and another over-smoothed.