What to Expect During a Central Air Conditioning Installation
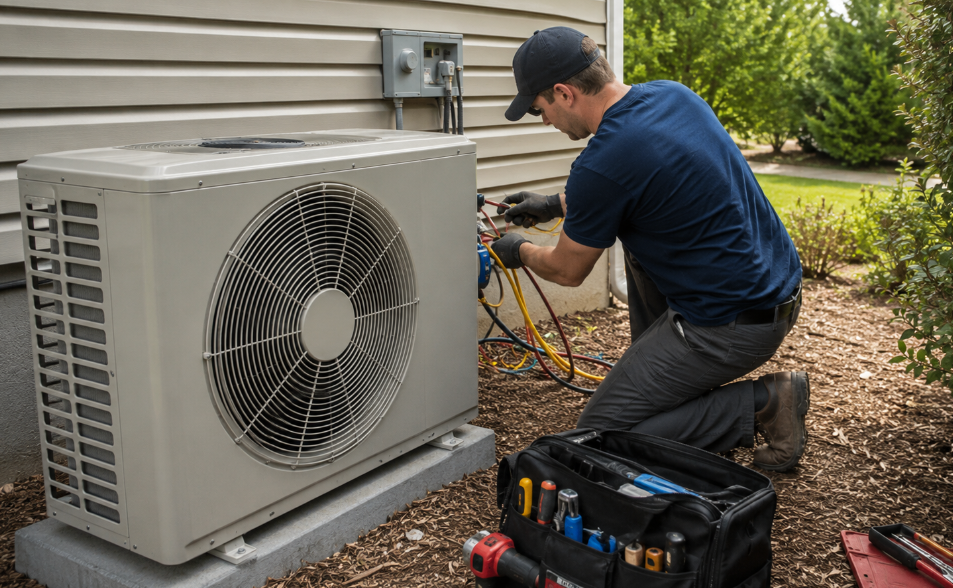
Getting a central air conditioner installed is one of the most significant investments in your home’s comfort you can undertake. After all is decided and the equipment is selected, it comes to the point when everyone wonders about the installation process itself: how long will it take, what will happen inside the house, how disruptive will it be, and how the equipment should work when it is installed.
The good news is that the process of installing a central air conditioner is a pretty predictable procedure. Being aware of the stages will help you get rid of uncertainties and prepare your home for this. The guide below describes the whole installation process, starting from the morning when the technicians come to your home till the point when the system will be handed to you.
Before Installation Day: The Assessment and Equipment Selection
The preparation that happens before installation day is what determines how smoothly the day itself goes.
A quality installation begins with a proper site assessment. This involves a technician visiting your home to evaluate the existing heating system, measure the home's square footage and layout, assess the insulation quality, examine the existing ductwork if your home has it, check the electrical panel for available capacity, and identify the best location for the outdoor condenser unit.
This assessment is not a formality — it directly determines which equipment is recommended and how the installation will be planned. An undersized unit will run constantly without achieving comfortable temperatures. An oversized unit will cycle on and off too frequently, creating humidity problems and premature wear. Correct sizing, based on a proper Manual J load calculation or equivalent assessment, is the technical foundation of a well-performing system.
Equipment selection follows from the assessment. The key specification to understand is the SEER rating — Seasonal Energy Efficiency Ratio — which measures cooling efficiency. Higher SEER ratings mean lower operating costs. In Canada, minimum requirements for new equipment are set nationally, but many homeowners choose units in the 16 to 20 SEER range to balance upfront cost against long-term energy savings. Your technician should be able to provide projected operating cost comparisons between different efficiency tiers to help you choose.
Permits are another pre-installation step that reputable installers handle on your behalf. Most jurisdictions require a permit for new HVAC equipment installation, and the inspection that follows permit completion provides an independent verification that the work meets local code requirements.
Morning of Installation: What the Technicians Do First
On installation day, the crew will typically arrive in the morning with the equipment already confirmed from the assessment. The first thing a professional team does before any work begins is walk through the work areas with you, confirming the planned locations for the outdoor unit and any indoor components, and identifying the path the refrigerant lines and electrical wiring will take.
This walkthrough is your opportunity to ask questions and flag any concerns before any work begins. Raise anything that was not discussed during the assessment — the placement of the outdoor unit relative to bedroom windows, whether there are any areas of the home where you are particularly concerned about protecting flooring or walls during the installation, or any specific timing preferences for when certain parts of the work happen.
The outdoor condenser unit location is confirmed and prepared. Most condensers sit on a concrete pad or composite pad beside the home, positioned according to manufacturer guidelines for clearance, drainage and airflow. The pad or mounting surface needs to be level and stable — technicians will verify this before placing the unit.
The Core Installation Process
With preparation complete, the installation proceeds through several interconnected tasks that typically run in parallel across the crew.
Connecting to the existing furnace or air handler is the central task for homes that already have forced-air heating and ductwork. A central air conditioning system in most Canadian homes works in conjunction with the existing furnace — the furnace blower circulates cooled air through the same ductwork that distributes heated air in winter. The evaporator coil, which is the indoor component of the air conditioning system, is installed inside or above the furnace air handler. This is where the refrigerant absorbs heat from the home's air before the now-cooled air is distributed through the ductwork.
Refrigerant line installation runs copper lines between the outdoor condenser and the indoor evaporator coil. These lines carry refrigerant between the two components and are insulated to minimise heat gain from the surrounding environment. The routing of these lines — through walls, along the home's exterior or through mechanical rooms — will have been planned during the assessment. This is the part of the installation that most affects the appearance of the finished work, as the lines will be visible where they run along exterior walls.
The electric connection is simply installing a separate electric circuit that connects the electrical panel to the condenser outdoors. For central AC, a dedicated 240-volt circuit is necessary, and the technician will check on the availability of space in the panel for installation of this circuit prior to the installation date. If an upgrade to the panel is needed, this would be determined during the assessment.
Drainage of the condensate is the draining of the moisture collected by the air conditioner from the air in the process of cooling. This is one of those issues that people tend to overlook but which is important nonetheless. If the drain is not properly installed or if it is improperly sloped, moisture may get trapped inside the air handling unit, leading to potential water damage and mould formation. A properly installed drain should be properly sloped and drain to the proper location and provide easy access for cleaning.
When selecting a central air installation company, it is worth specifically asking how they handle condensate drainage and what provisions they make for drain maintenance — the quality of the answer tells you a great deal about the thoroughness of their approach.
Refrigerant Charging and System Testing
Once all physical components are installed and connected, the system needs to be properly charged with refrigerant and tested before it is considered complete.
Refrigerant charging involves adding the correct quantity of refrigerant to the system — too little or too much both reduce efficiency and can cause operational problems. Technicians use manifold gauges to measure system pressures and verify that the refrigerant charge is within the manufacturer's specified range for the conditions on that day.
A leak check is performed before and after charging to confirm that all connections are sealed properly. Refrigerant leaks are both an environmental concern and a performance problem — even a small leak will gradually reduce the system's cooling capacity over time.
System testing involves running the air conditioning through a full operating cycle and verifying that the supply air temperature coming from the vents is within the expected range, that the outdoor unit is operating correctly, that the thermostat is communicating properly with the system, and that the condensate drain is flowing correctly.
Technicians will check the temperature split across the evaporator coil — the difference between the air temperature entering the coil and the air temperature leaving it — to confirm the system is performing as designed. A temperature split of 14 to 22 degrees Fahrenheit across the coil is the typical target range, depending on conditions.
The Final Walkthrough: What Should Be Covered
A good installation always concludes with a full walkthrough that ensures that you understand everything there is to know about running your new unit.
This will include showing you how to program the thermostat to operate in cool mode, explaining the appropriate temperatures and programming schedules, explaining how to change the air filter and how often this should be done, as well as showing you where the system shut-offs are located.
Filter maintenance is the single most important thing you can do to protect your new system. A clogged filter restricts airflow across the evaporator coil, which reduces cooling capacity and in extreme cases can cause the coil to freeze — leading to a service call for a problem that regular filter changes would have prevented entirely. Most residential systems benefit from filter changes every one to three months depending on household dust levels and whether pets are present.
Warranty registration should be completed at this point — either by the installer or with their guidance. Manufacturer warranties on residential AC equipment typically cover parts for five to ten years, with some manufacturers offering extended compressor coverage for registered equipment. The installation company's workmanship warranty should also be clearly explained, including how to contact them if any installation-related issue arises.
What Happens After the Technicians Leave
Most homeowners notice the system working properly within minutes of the technicians completing their work — the home begins cooling, the thermostat responds correctly and the outdoor unit runs quietly in the background.
In the first few days, pay attention to how the system performs across different times of day and in varying outdoor temperatures. A well-sized, correctly installed system should maintain your set temperature consistently without running continuously during mild conditions or struggling on hot days.
If you notice anything unusual — water around the indoor unit, ice forming on the refrigerant lines, unusual sounds from either the indoor or outdoor components, or rooms that are not reaching the set temperature — contact your installer. Issues identified quickly in the first days are almost always easier and less costly to address than problems that develop over weeks.
A good practice to ensure that the system runs at maximum efficiency for its lifetime would be scheduling a maintenance check annually during spring before the cooling season starts. This will prevent any problems from escalating into a system failure in the peak of summer.
Frequently Asked Questions
Q: How long does a central air conditioning installation typically take?
An average installation that connects to pre-existing ductwork and an appropriate furnace will take four to eight hours, and this can all be accomplished within a single day. On the other hand, installations which are more complex, with several zones and electrical panels and/or heat pumps, will take more time.
Q: Do I need to be home during the installation?
Yes, at least at the beginning and end of the installation. You can be sure that you are aware of where things will go and what questions need to be asked prior to the actual work beginning. You will know how to use and maintain the system..
Q: Will the installation make a mess in my home?
Reputable installers use drop cloths and take precautions to protect flooring and finished surfaces in work areas. The work is not dust-free — particularly where lines pass through walls — but a professional crew will clean up after themselves and leave work areas in acceptable condition.
Q: How soon can I run the new system after installation?
In all situations, the system has been operational and checked before leaving by the technicians.This system is ready for immediate use following its installation; nevertheless, it is preferable to wait until the system completes one cycle of cooling before its evaluation.
Q: What SEER rating should I choose for my new system?
For most Canadian homeowners, a unit in the 16 to 20 SEER range provides a good balance between upfront cost and long-term energy savings. Higher SEER units cost more upfront but deliver lower operating costs — your installer should be able to calculate projected payback periods for different efficiency options based on your typical usage.
The Bottom Line
A central air conditioning installation is a well-defined process that most experienced crews complete in a single day. Understanding the steps — from the pre-installation assessment through refrigerant charging, system testing and final walkthrough — removes the uncertainty and helps you prepare appropriately.
The quality of the installation team matters as much as the quality of the equipment. A correctly sized, properly installed system will perform efficiently and reliably for fifteen years or more. A poorly installed system will underperform from day one regardless of the brand on the nameplate. Choosing an installer with documented experience, proper certification and a clear warranty on their workmanship is the most important decision in the whole process.